How to make a swiss dot pattern
This really has to be the simplest pattern of all which is why I am starting with it. Swiss dot is just row after row of dots. But by learning this you are opening up a whole world of pattern making.
So are you ready to begin...excellent :)

Open a new window by clicking in your work space and then clicking the control button and the n button at the same time. This will bring up the window above which asks you what parameters you wish to use.
This time I am choosing 1cm by 1cm with 300 per inch resolution, RGB colour and a transparent background.
So now you have your window open. It is probably very small so use the magnify icon to make it bigger. Click on the magnify button on the left. Now at the top a new tool bar will have appeared just above your workspace that says fit screen , fill screen and print size. Click on fit screen. Get familiar with these buttons because when you make elements you will probably use them a lot.
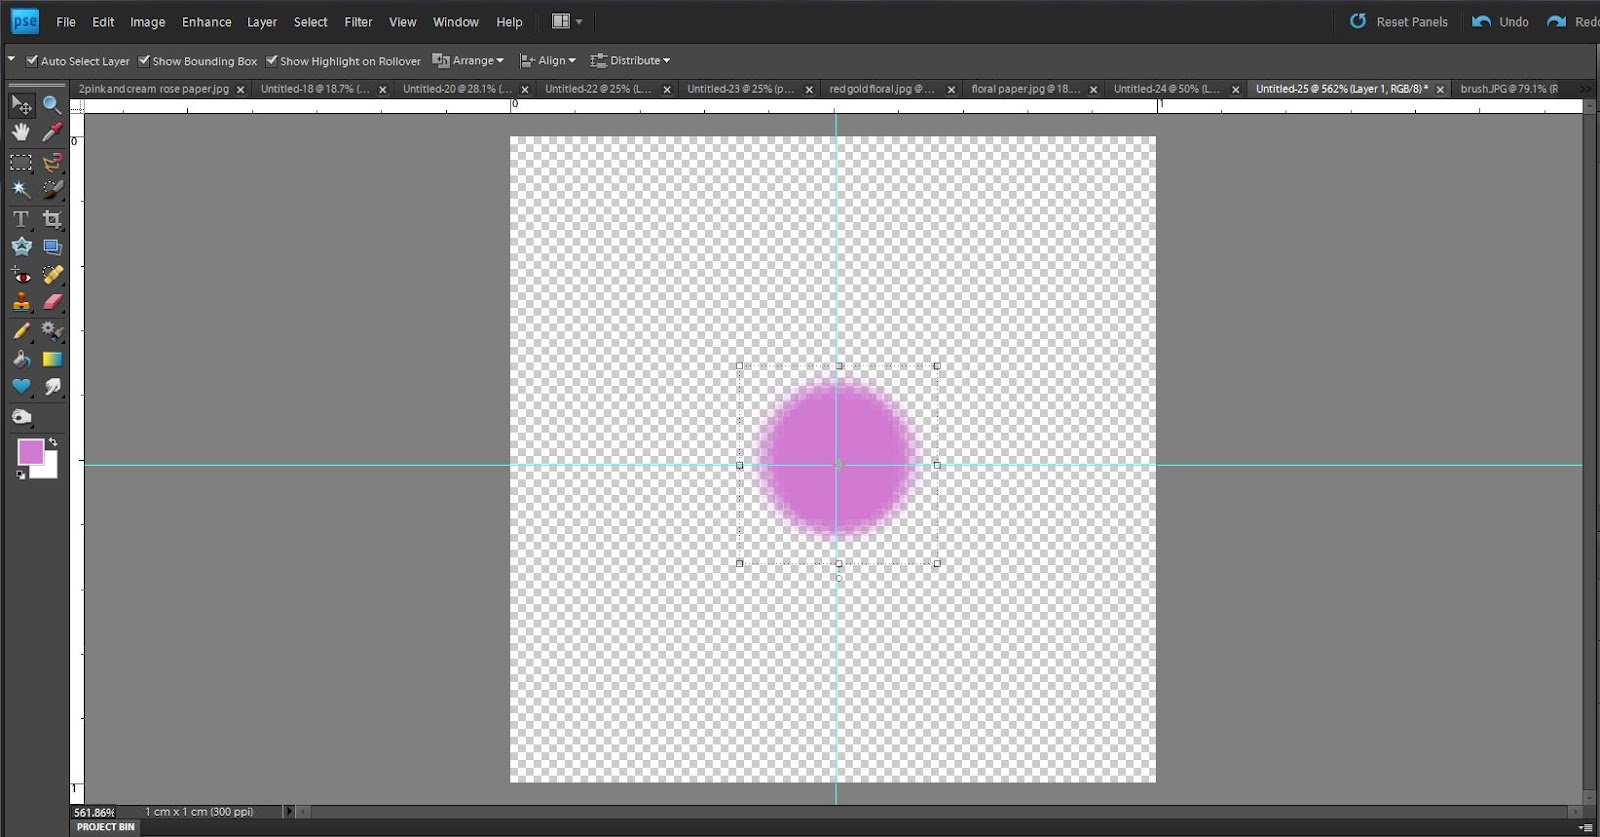
So now you have your screen and are chomping at the bit. Where are my dots I hear you say. There are two ways to get your dot. The simplest way is to get your brush by clicking on the brush icon on the left hand menu. If you can't find it it may be because at the moment yours looks like a pencil. Click on the pencil and then right click, this will bring out a new menu, choose brush. Once you have your brush look at the top menu which has now appeared. This menu gives you the choice of what brush to use and what size. Choose a hard brush, it doesn't really matter what size as you can adjust this using the size slider and pick any colour you like. Put a dot in the middle of the square.

It will probably look a lot like this. You may be wondering well is this in the middle. To be very honest with this particular pattern it doesn't make any difference at all, but as you move on in pattern making it will so if we are being very picky we can get out rulers out. Rulers are in view tab up the top where my arrow is pointing in the picture above. A drop down menu will come out and you pick rulers. The rulers will now show as a white edging along the top and left side as in my picture above.
Carefully click in this white line and then drag across the screen from the left side. A line should come out. Pull it across to 0.5 on the ruler. And then again from the top. You will now have your exact centre. Remember this for future pattern making :)
How big should I make my dot? Well the fun of photoshop is in the experimenting. So I want you to make your own choice and then if it is not to your liking you will know if it is too big or too small. Consider this though the smaller the dot the more spaced out your pattern will be. If your dot fills the whole screen there will be little space in between.
Now click on the edit button along the top and click define pattern. In the new menu give your pattern a name...dot seems good... and then click OK. Phew! You are so close now.
So click control n for a new window. Make this one a lot bigger. If you are making a background about 30cm by 30 cm, 300 per inch resolution, RGB, transparent is good.
In your new layer click on the layer tab in the top row it is the 5th button along. Drop down menu go down to new fill layer and then a new drop down choose pattern.
Your new pattern will always be the first one that loads so just click OK on the box that comes out.

Da da! You have dots! And lots of them. Take a bow and feel proud of your creation. The box that is showing gives you a chance to scale the dots bigger or smaller. The ratio between them will always be the same though. So if your dots are too close together go back and make your dot smaller, or vice versa. Now you have this pattern it is yours and there is so much you can do with it. I get a little excited about patterns because I love them so much. Must be the autism in me. Well you can rest now if you want to. Save your page of dots as a png file because you want to keep the transparent background.
Or...... you can choose the second method, after all you know your way around photoshop a little better now.
So open a new window with control n and choose 1 cm by 1cm parameters as before.
This time go to the shape button. It looks like a heart on the left hand menu. Now the shape menu will open along the top bar. Here you can choose shape and size. For a dot we are going to choose a filled in circle.. which is the one that is solid black and make the size 0.5 by 0.5.
Click in the middle of your window and a circle will appear. You can now resize this if you wish. If you look at this dot in comparison to the one made by the brush you will see the edge is more defined. So the shape method gives a cleaner dot. Is this better? Well yes and no. If you want well defined dots in your pattern this is for you, if you want a pattern that blends then perhaps brush is better.
Once you have your dot in place get the marquis tool and surround the dot. Then click move and left arrow. This will surround your shape then the computer asks you to simplify the shape click ok. Why am I doing this? Well unless you simplify the shape you can not use it to define as a pattern because shapes are vectors not rasters. Look up the definitions of these if you want, but know that this is just how it works :) now follow the instructions above to get your pattern.
Why have I given you the second method...well it is because this also opens up new options. Why just have a dot...what about hearts...or flowers? You see I don't want to teach you just how to make one pattern. I want to teach you the method to make anything you want. With confidence you will have opened the world to amazing background papers.

Here I have chosen to use a heart shape and I have scaled it up so you can see it better. I look forward to hearing you have made a start to creating great patterns.
Claire
No comments:
Post a Comment